You've probably seen pictures of this greenhouse made from recycled soda bottles and wondered how difficult it would be to make. As it turns out, the design is rather simple and doesn't require more than basic do-it-yourself carpenter skills. It does, however, require a lot of empty two-liter soda bottles - to a tune of 1,500 of them!
If you'd like to give it a try, you can find the complete instructions from the Greenspace Education Project . These plans make a 6 ft by 8 ft greenhouse with a height of 6 ft, which gives you plenty of room for growing flowers and veggies. This is fun project for the whole family and makes a great addition to the garden - but you better start saving bottles now if you want to complete this project this spring. Until Next Time . . . HAPPY GARDENING!
0 Comments
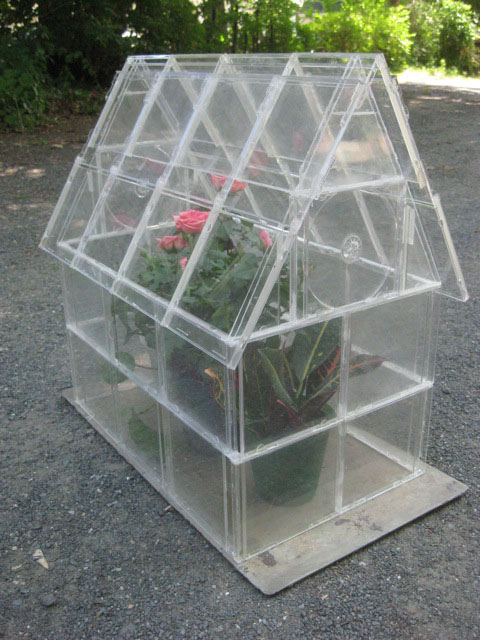
I fell in love with this mini greenhouse as soon as I saw it. It is made from old CD cases, you know, those plastic cases you saved because you were sure you'd find a good use for them someday. Well, today is your day!
This greenhouse measures 11" by 18" by 20" and is ideal for seed starting or for providing some TLC to special plants. Because it has a hinged door, you can open or close it to regulate temperature and humidity. You could even use this mini greenhouse as a terrarium for moisture-loving plants or create a miniature fairy garden to enjoy all winter long. For those of you with inquisitive cats or small children this is a great way to keep seedlings or plants out of their reach. You can find detailed instructions for making this CD case greenhouse at So You Think You're Crafty. Until Next Time . . . HAPPY GARDENING! 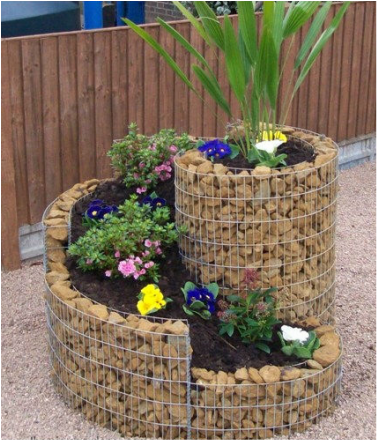 by The Micro Gardener I've been admiring stone walls and spirals for a while now, but I never realized until recently how easy they are to make on your own. The mesh wire baskets are referred to as gabions. They are designed to hold rocks or other decorative material. They give the illusion of a wall of rocks without all the labor of stacking and securing a rock wall. Anne from The Micro Gardener shares tips and instructions for making the spiral herb garden, but doesn't provide details for making the gabion spiral. This can be accomplished by cutting two identical lengths of wire mess and then cutting strips to form a boxed end on both ends of the wire mesh. These strips determine the thickness of your wall - typically four to five inches. You can attach them with wire or garden ties. You can also create a bottom by attaching a strip of wire mess (to the width of the strips for the ends) to form a boxed edge to the bottom. This provides more stability and makes it easier to maneuver the spiral, but is not necessary.
I don't know about you, but I'm dreaming of other projects using this simple method to create a faux wall or cube of rocks. If you ask me, "Gabion's Rock!" Until Next Time . . . HAPPY GARDENING! 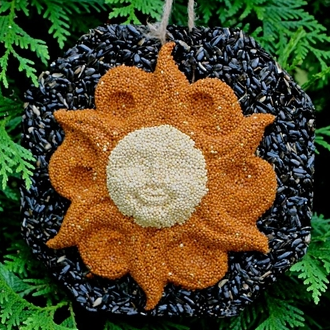
My daughter gave me this adorable little 'sun' birdseed wreath for my birthday. It combines my love of the sun motif with my love for feeding the birds. I'm not sure how well the string will hold up in the weather, so I'm going to hang it under the roof of my front steps where it will have some protection from the wind and snow while still being available to hungry birds.
When I read the ingredients, I noticed that it included birdseed and gelatin - which, of course, made me wonder if I could make one of my own. With a few minutes of research, I found a recipe for making your own seed wreath or molded seed block. Here's how you make them. Ingredients:
Instructions:
Tips
Until Next Time . . . HAPPY GARDENING! 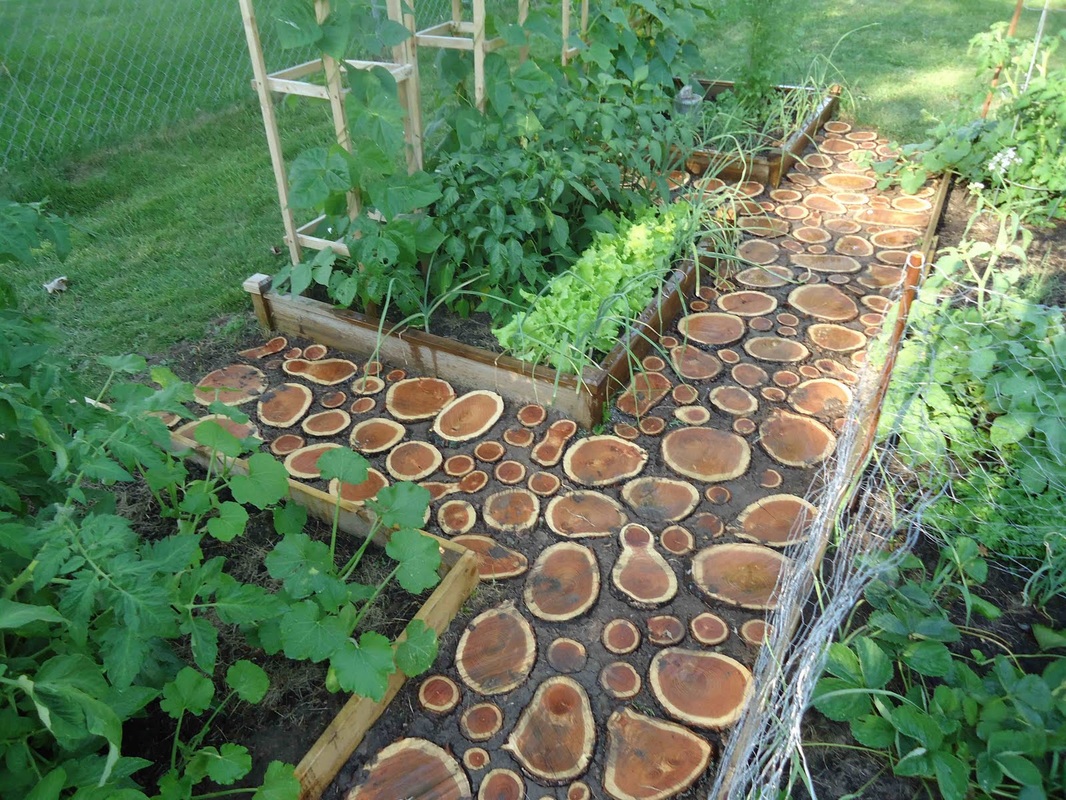
by Domesticated Nomad
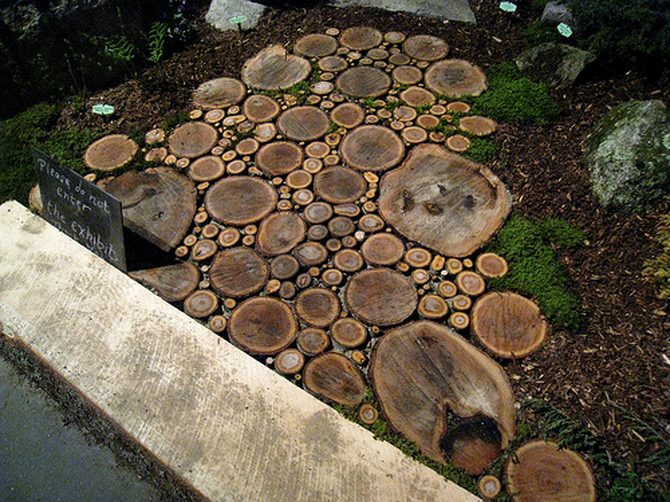
I found this rustic little garden path made from rounds of wood last year and vowed to make one myself. As you might have guessed, that project got put on the back burner and is waiting for me again this year. I have the perfect place for it around three small raised beds at the back of my lawn. Not only is it attractive, it also eliminates the need to cut the grass around the beds. As you can see from the photo, it is made entirely of slices of wood (about 2 inches thick) set into the soil. The Domesticated Nomad blog gives more details about making this garden path. This idea could easily be adapted to create a walkway through the yard or to create an area for growing flowers and herbs in big pots. With a little time and energy you could even create a circular area for that specimen plant or a tiny path through your fairy garden.
|