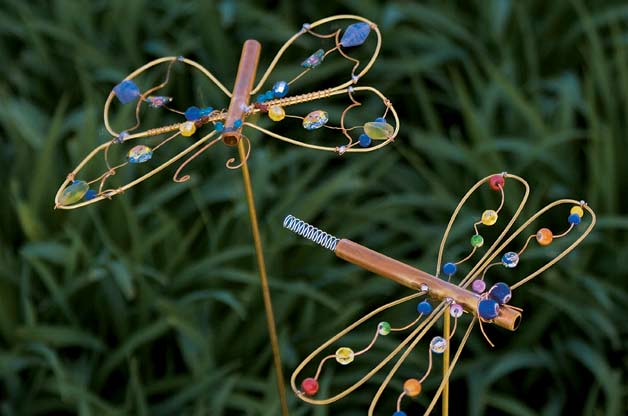
 by Eric Smith - Birds & Blooms Nearly everyone loves dragonflies and butterflies as they flitter on gossamer wings. This cute garden craft lets you express your love in style. They add color and a touch of whimsy to the garden, but could be adapted for adding to plant pots inside during the winter too. You'll be surprised at how easy they are to make. I found this garden craft on the Birds & Blooms site.You can find complete instructions there.
Altering the size and shape of the wings transforms your creation into a butterfly - so there is plenty of room to experiment to create a unique design. This is another project that I'm adding to my list for this summer and I hope you will too. Until Next Time . . . HAPPY GARDENING!
0 Comments
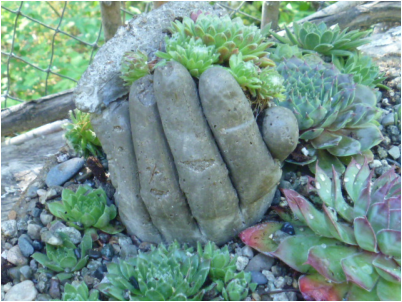 Blue Fox Farm via Wikipedia Creative Commons Lisc. These amazing garden hands are made with nothing more than surgical gloves and some hypertufa or Portland cement. The original DIY craft comes to us from Blue Fox Farm. Jacki filled ordinary surgical gloves with hypertufa, formed them to the shape she desired by curling them inside a plant pot and left them to harden.
Jacki admits that the fingers break easily. This inspired Debra Anchors from Upcycled Garden Style to try hers with plain cement. Debra explains that you should fill the gloves with water and then empty them to moisten the insides before filling them with cement. She also recommends pricking a small hole in the end of the fingers when you fill them with cement to allow you to burp them and prevent air bubbles in your garden hands. You can read about both of their projects by following the links. Basic Hypertufa Recipe Mix equal parts cement, peat moss and perlite with water to make a soupy mixture the consistency of cake batter. This creates a lightweight material that gives the illusion of cement. I haven't made these garden hands, yet, but they are going on my list of garden projects for this summer. Until Next Time . . . HAPPY GARDENING! 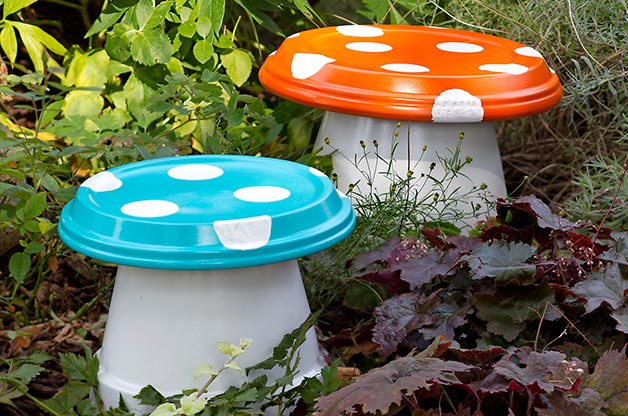 By Shalana Frisby via Birds & Blooms This adorable DIY craft comes from Birds & Blooms and makes the perfect addition to flower and fairy gardens. This craft is inexpensive, easy-to-make and can be painted in any color. I tend to fancy red and white mushrooms for the fairy garden, but you can choose any color that tickles your fancy.
I'm thinking that this is the perfect winter craft to keep the gardening bug in all of us happy until the snow melts. You can find the complete instructions for making these DIY plant pot mushrooms at Birds & Blooms. Until Next time . . . HAPPY GARDENING! 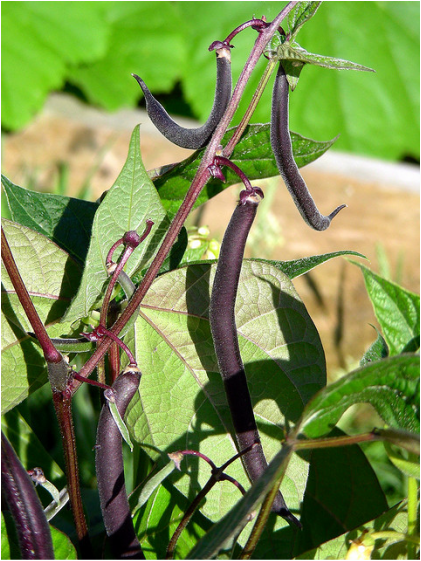 by B.D.'s world via Flickr I typically grow purple, green and yellow bush beans in my garden every year. While the yellow wax bean has its own distinct flavor, I've never seen much difference in the flavor of purple and green beans. I grow the purple beans because they are pretty and I'm like a little kid who still gets a kick out of watching them change from purple to green when I cook them.
Last summer, I planted two little rows of purple beans along the edge of my raised bed. Each row was approximately 3 feet long. I harvested these beans all summer and had plenty for my husband and I to eat fresh. I even had a few to freeze. Before I go on, let me tell you that I have never been a fan of frozen green beans because freezing toughens them and I don't care for the texture. But that was before I tried frozen purple beans. The other night when I cooked dinner I noticed the package of frozen beans and decided it was a good time to try them. I threw a handful of frozen purple beans in a stir fry and they were amazing. They were tender and flavorful and if I hadn't known better, I might have been fooled into thinking they were fresh beans. Unfortunately, I don't know what kind of purple beans I grew, as I bought them in the bulk seeds of a local store and I believe they were simply labeled as purple bush beans. But, I can tell you that I intend to grow more purple beans this summer and freeze them for winter use. If you are looking for an exceptional bean for freezing, I highly recommend trying purple beans. 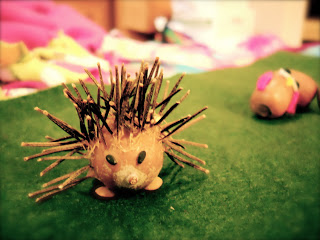 Hedgehog Nature Craft via Roots of Simplicity I found this cutie on Roots of Simplicty. Believe it or not the body is made from an acorn with the cap removed. It is then slathered with wood glue and allowed to set until the glue is tacky. The quills are made from the seeds of marigolds and the tiny feet are lentils. According to the description, the eyes are made from black sesame seeds, but they look like apple seeds to me. For complete instructions, visit Roots of Simplicity.
This is a delightful, if slightly messy, craft for kids that gives you an opportunity to discuss the role of seeds in nature, as well as opening a dialog about the lovable hedgehog. This activity even leaves room for exploring the differences between hedgehogs and porcupines and their habitats. But, most of all, it is just plain fun to make nature crafts with your kids. Until Next Time . . . HAPPY GARDENING! 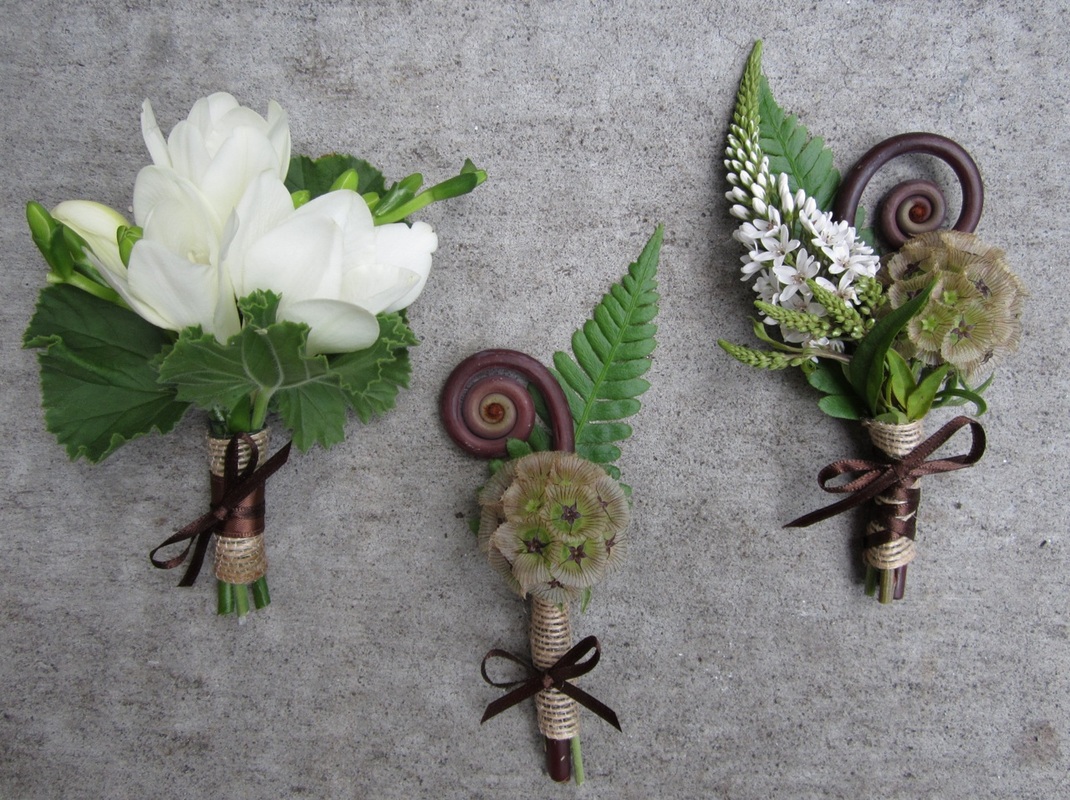 Fern Boutonnieres by Sammy's Flowers These adorable fern boutonnieres by Sammy's Flowers are perfect for those who wish to celebrate nature. While it's difficult to tell in this picture, the fiddleheads are typically made from clay and added to a cluster of real flowers. These were made for a wedding, but would work for any special celebration. When made from silk flowers, they would make delightful bouquets for tiny shadow boxes!
Go ahead and have some fun creating your own garden for display in your home during the cold winter months. Until next time . . . HAPPY GARDENING! 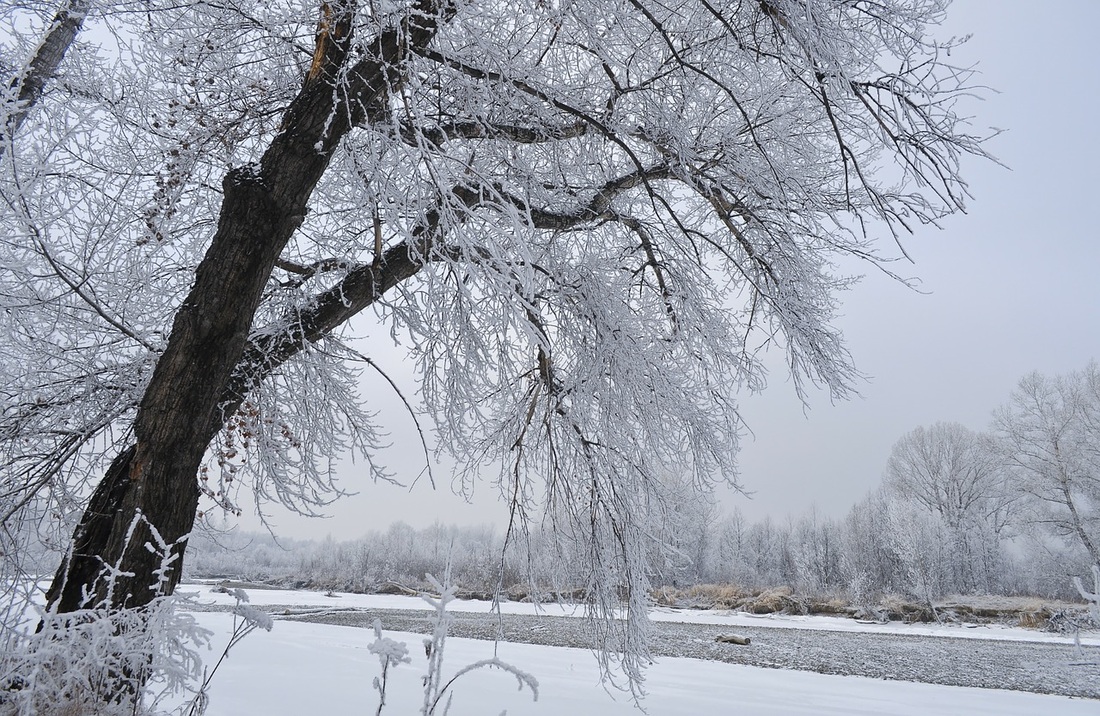 If you live in Maine, you already know that we have been plunged into the deep freeze this week. In my area, the temperatures hovered near 20 below zero last night. While most people are worried about frozen pipes and dead batteries, my thoughts are with my perennial bed. The combination of a light cover of snow and sub-zero weather can spell disaster for tender perennials.
This is exactly why it is so important to check the hardiness zones for your perennials before planting them. I'm always tempted to try perennials that "may survive" in my plant hardiness zone, but when January rolls around and we are plunged into the deep freeze, I'm glad I didn't. I planted new phlox this year, but I think they have enough of a root system to withstand the cold weather. I dug them up from the phlox my mother grew 40 years ago. According to Garden Crossings, most phlox are hardy to zone 4 with some hardy in zone 3. That means they should safely handle temps between -25 and -30 degrees with no problems. Seeming they have withstood Maine winters for the past 40 years, I think they will be fine, but I'd be lying if I said I wasn't a little concerned. A few years ago I lost most of my herbs due to a cold, icy winter with little snow. Now, I'm not saying I want to get pummeled with snow, but a foot or so would be good to cover the beds and insulate them from the cold. For now, I'll be sending warm thoughts to my perennials and promising to cover them better next year. Until next time . . . HAPPY GARDENING!  One of the things I love about January, other than sitting by the fire and dreaming of next summer's garden, is the fact that the days begin to lengthen again. You've probably noticed that it is darker in the morning than it was a month ago and wonder if I have lost my mind. The marvelous part of that is that it gets light a few minutes later each day. By the end of January, we will have gained nearly 40 minutes of light at the end of the day and it will continue until spring. In December the sun set at just before 4 p.m. for the entire month. By the end of January it will set at 4:38 p.m. By the end of February, the sun will set a 5:20 p.m. I don't know about you, but I am always amazed to watch the progress as we near spring. It gives me hope that we will soon be nurturing green, growing things. Today, I am celebrating the return of the sun and the promise of a productive year of gardening. I hope you are too. (If you are curious about when the sun rises and sets in your area, you can use this handy calculator to find out the exact time for sunrise and sunset in your location.) Until Next Time . . . HAPPY GARDENING!  Red Spathiphyllum Image courtesy of Visoflora.com I'm frequently asked when you should start fertilizing your houseplants in the spring. It's not always an easy question to answer. Nearly all plants require a rest period in the fall or winter. During this time, you should withhold fertilizer and give your plants time to rest before they begin the hard work of producing new foliage and blooms for the following year. How long you let them rest depends on the plants. I'll be honest with you. I let my plants tell me when it's time to begin growing. As soon as I notice a flush of new growth, I feed them a weak solution of plant food. I'm going to begin today. My red Spathiphyllum is showing a lot of active growth and I think it could use a little boost of nutrients to keep it going. Interestingly, I have had this plant for over 10 years. It has has never flourished like it has this year. I attribute that to accidentally putting it in the right lighting. I had tried it near several windows in the home and it did okay. I finally hung it in a south window that is partially shaded by a pine tree outside the window. It did better there, but it still wasn't anything to brag about. If your houseplants have began to show signs of new growth already, go ahead and give them a dose of plant food mixed to 1/4- to 1/2-strength - but don't forget to water them first. Applying plant food to dry soil can damage the roots of your plants. |