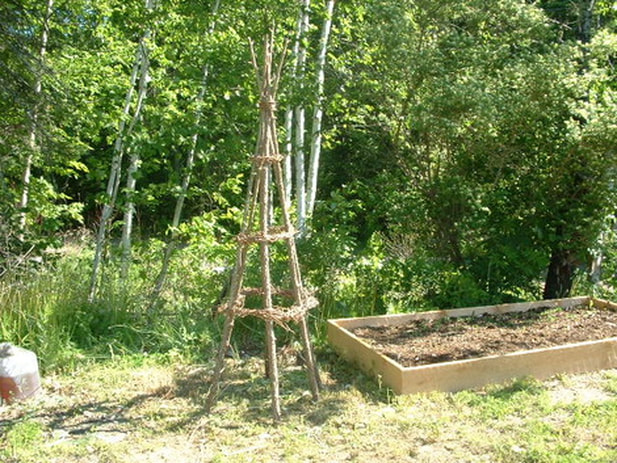
How to Make a Rustic Cedar and Grapevine Trellis for Pole Beans
There is something about rustic garden trellises covered with lush, green foliage and brightly-colored blooms that transports us to a simpler time. These quaint structures, reminiscent of days gone by, evoke a sense of oneness with nature as they are made entirely of natural products that support the environment. Making your own grapevine and cedar teepee trellis is easier than you think, and can be completed in an afternoon.
These trellises are ideal for Pole Beans, but can be used for any climbing flower or vegetable.
- Determine the size of your trellis according to the intended use. I made mine approximately 7 to 8 feet tall to provide ample room for pole beans, but you can adapt these directions to any size you desire. Small two-foot trellises are stunning when covered with dwarf nasturtiums or sweat peas and can be placed over the top of large containers. Freestanding trellises for flowers or climbing vegetables can be erected in the garden.
- Select six cedar poles with a diameter in proportion to the finished project. For my trellis, I cut poles with a diameter of 2 to 2 ½ inches at the base that tapered to an inch or less at the top. For smaller trellises, choose cedar poles with a smaller diameter.
- Remove any branches or foliage from the cedar poles with pruning shears or a sharp knife to create a smooth surface. Trim all poles to the same length. The difference of an inch or two will affect the overall appearance of your finished teepee trellis and will make your work more difficult.
- Stand the poles and cross them at the top. This is actually easier than it sounds, but you may need a helper for this step. Space the bottom of the poles in a circle approximately 2 ½ feet in diameter and cross the tops so that 4 inches protrude from the top to form a "crown". Work with the poles until they stand on their own. Adjust the bottoms of the cedar poles so they are evenly spaced in a circle.
- Wrap the tops at the point where they cross with garden twine or rope and secure tightly. This holds the teepee trellis together while you complete the levels with grapevine.
- Determine the number of levels for your trellis. Three works well, but you can add more if you prefer. Measure and mark the levels on the poles before you begin working with grapevine. Divide the total height of the trellis by the number of levels and mark the layers accordingly.
- Begin at the bottom of the trellis and wrap fresh grapevine around the outside perimeter of the cedar poles to form the base for the first level. Tie off with garden twine or jute. Two to three layers creates a solid base.
- Cut smaller vines and begin weaving them around the base and between the poles. Tuck ends into the spaces between the vines and the cedar poles.
- Repeat the procedure on all levels of the cedar trellis. Finish off the top by wrapping vines tightly around the point where the cedar poles cross and secure them with jute or garden twine.
- Position the cedar and grapevine trellis in its permanent location and adjust as necessary so that it stands properly.
- Anchor a garden stake or pipe into the soil at the base of three or four of the poles and secure the poles to the stakes with wire or rope. This prevents the trellis from toppling in the wind.
Plant pole beans or other climbing flowers or vegetables around the base of the teepee. If you are making a smaller rustic teepee trellis, place it over the top of containers or large pots filled with climbing flowers. Small teepees are ideal for decks, patios or balconies and add a rustic touch to your garden.
Return to Beans
